这篇文章主要介绍了netapp模拟器ontap 8.1的修改过程,因为下载的是vm文件,原文地址:http://zenshaze.com/wp/?p=371。另外,具体安装请见文章:NetApp模拟器Data ONTAP Simulator 8.1下载及安装指南
Part 1 Downloading and basic setup of VM
First you need to download the NetApp ONTAP 8.1.1 Simulator from NetApp at http://now.netapp.com/NOW/cgi-bin/simulator. You must have a NOW account to download the Simulator. (Do not ask me for the Simulator). While you are there download the OnCommand System Manager a GUI for NetApphttps://now.netapp.com/NOW/cgi-bin/software. In order to run the Simulator you must have VMware software, I am using VMware workstation but player will also work.
Extract the Simulator to the directory of your choice. Several files will be extracted the one we are looking for is DataONTAP.vmx, this is the Virtual Machine.

Double clicking this will open the VM in VMware workstation (or player).
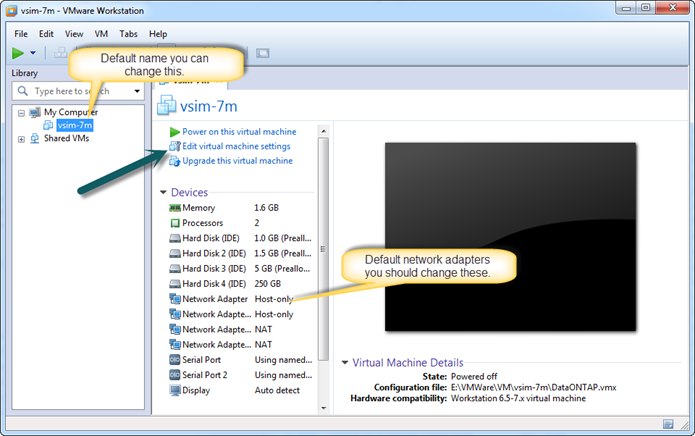
There are a few things we are going to change before we start the VM, so first click on the edit virtual machine settings.
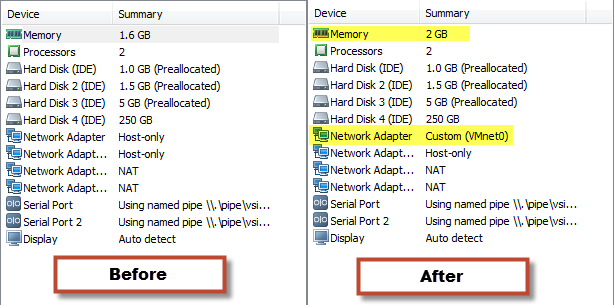
On the hardware Tab I an going to kick the memory up to 2 Gig (you do not need to change this), and set the first network adaptor to use bridged (VMnet0) or whatever you need to make it work in your network.
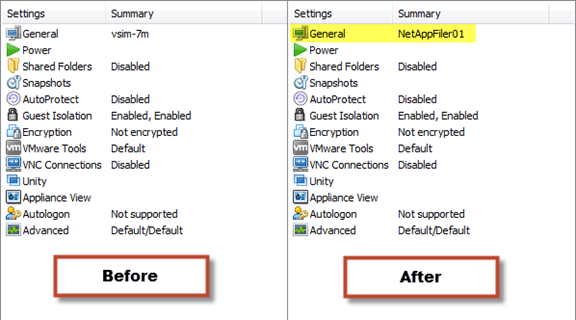
On the options tab I am going to rename the VM.
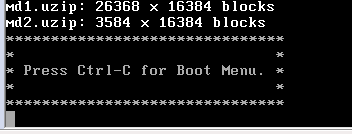
At this point if you start the VM it will go into an endless boot loop. You need to first reset the Filer and run through the initial setup. Do this by pressing CTRL-C when prompted.
At the boot menu select option 4 ‘Clean configuration and initialize all disks’.
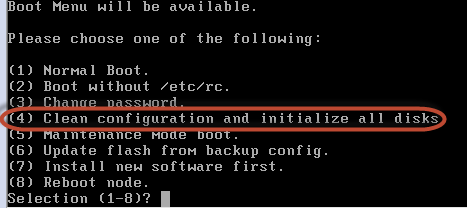
- Zero disks, reset config and install a new file system?: Yes
- This will erase all the data on the disks, are you sure?: Yes

The Virtual Filer will reboot after it starts back up you will be at the setup. You can enter in the information as given here or use whatever information is correct for your setup. (Where no information is given you just press ‘enter’)
- Please enter the new hostname []: NetApp01
- Do you want to enable IPv6? [n]:
- Do you want to configure interface groups? [n]:
** I am only setting up one network adaptor at this time you can configure all of them now or later)
- Please enter the IP address for Network Interface e0a []: 192.168.1.210
- Please enter the netmask for Network Interface e0a [255.255.255.0]:
- Please enter media type for e0a {100tx-fd, tp-fd, 100tx, tp, auto (10/100/1000)} [auto]:
- Please enter flow control for e0a {none, receive, send, full} [full]:
- Do you want e0a to support jumbo frames? [n]:
- Please enter the IP address for Network Interface e0b []:
- Please enter the IP address for Network Interface e0b []:
- Please enter the IP address for Network Interface e0b []:
- Would you like to continue setup through the web interface? [n]:
** I like using the command line for the first setup if you like you can use the web interface https://FilerIP/api
- Please enter the name or IP address of the Ipv4 default gateway: 192.168.1.1
- Please enter the name or IP address of the administration host: 192.168.1.4 <— this is the IP of the host but could be any computer you wish to administer the filer from
- Please enter timezone [GMT]: EST
- Where is the filer located? []:
- Enter the root directory for HTTP files [/home/http]:
- Do you want to run DNS resolver? [n]:
- Do you want to run NIS client? [n]:
- Do you want to configure the Shelf Alternate Control Path Management interface for SAS shelves [n]:
- Setting the administration (root) password for NetApp01 …
New password: ********** <– You will not really see anything while typing
- Retype new password: **********
After the network interface becomes active you are done, this will take a little bit of time. The filer is active at this point and you could use it, but we want to get the largest disk space we can.
************************************************************************************************
Part 2 enabling the other “Shelves” and adding Disks
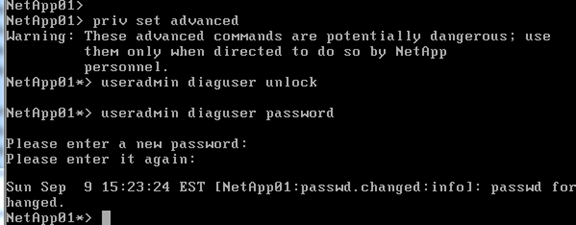
Switch to “advanced mode” and unlock the diagnostic user
priv set advanced
useradmin diaguser unlock
useradmin diaguser password
Enter in new password. <– Password must have letters and numbers and must be at least 8 characters.
Confirm password.
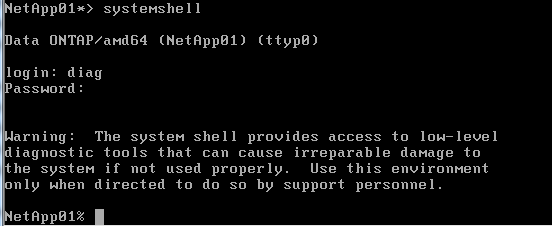
Launch the systemshell and login as diag, enter the password you have just set.
Systemshell
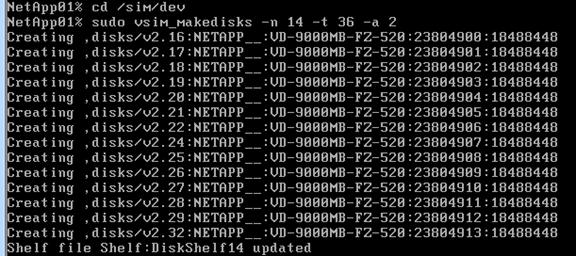
Next we will add 14 Disks to shelf 2 and 3. Shelves 0 and 1 already have 1 Gig drives assigned, we will change these later.
setenv PATH “${PATH}:/usr/sbin”
cd /sim/dev
sudo vsim_makedisks -n 14 -t 36 -a 2
sudo vsim_makedisks -n 14 -t 36 -a 3
Then exit systemshell and lock the diaguser.
exit
useradmin diaguser lock
Set admin mode and reboot
priv set admin
reboot

Login when filer is back up. Assign all unowned disks:
disk assign all
************************************************************************************************
Part 3 Move Config to the new disks
We need to move the current root volume information to a new aggregate and volume on the new shelves. The current aggregate looks like this:

I am going to create another one similar to this one but on 3 of the new disks we just added.

The root volume looks like this:

I am going to create another one similar to this one but on aggr1. (Yes I know this is over kill on volume size)

Now copy the current root to where the new root will be.
ndmpd on
ndmpcopy /vol/vol0 /vol/vol1
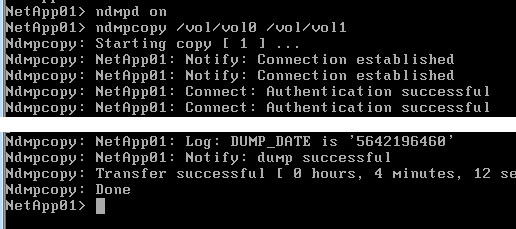
Wait until the ndmp copy has finished
Set the new volume as the root.
vol options vol1 root

Reboot.
reboot
Something seems to go funny with the SSL certificates so you cannot also connect with OnCommand System Manager.
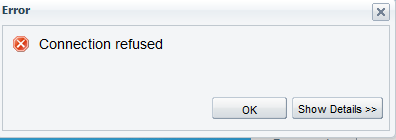
The easiest way is to just recreate them.
options ssl.enable off
secureadmin setup ssl

Enter Y to proceed and then you can just accept all the defaults. Or if you really want you can put in more accurate values for your setup.
Then turn back on SSL.
options ssl.enable on

************************************************************************************************
Part 4 Remove the original Disks and replace with larger ones
Remove the old vol0 and aggr0.
vol offline vol0
vol destroy vol0

aggr offline aggr0
aggr destroy aggr0

Remove all the old disks and shelves
options disk.auto_assign off
priv set advanced
disk remove_ownership v5.*
disk remove_ownership v4.*

Rename the root aggr and vol back to the original names, not really necessary but will make things cleaner if you follow any directions from other places.
Rename root volume and aggregate
vol rename vol1 vol0
aggr rename aggr1 aggr0

Now follow the directions from above create disks for shelf 0 and 1
Launch the systemshell and login as diag and enter the password you set from the step above
useradmin diaguser unlock
systemshell
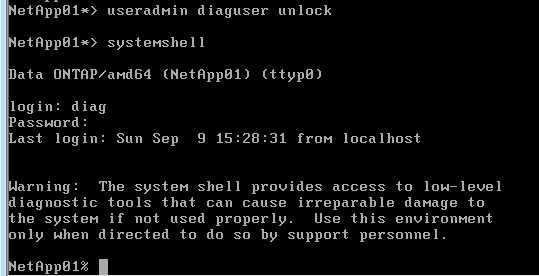
Next we will add 14 Disks to shelf 0 and 1.
setenv PATH “${PATH}:/usr/sbin”
cd /sim/dev/,disks

Remove old disk files
sudo rm v0*
sudo rm v1*
sudo rm ,reservations

Now create the new Disks
cd /sim/dev
sudo vsim_makedisks -n 14 -t 36 -a 0
sudo vsim_makedisks -n 14 -t 36 -a 1
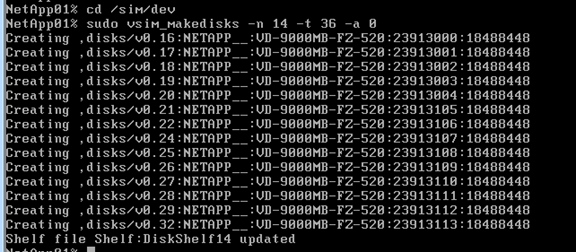
Exit, lock user, revert to admin mode and reboot
exit
useradmin diaguser lock
priv set admin
Reboot

************************************************************************************************
Part 5 Finishing up
Turn off the autosupport warnings
options autosupport.support.enable off
options autosupport.enable off

Turn on auto assign and assign disks
options disk.auto_assign on
disk assign all

Now is a good time to shut the system down and take a snapshot of the VM.
Halt
